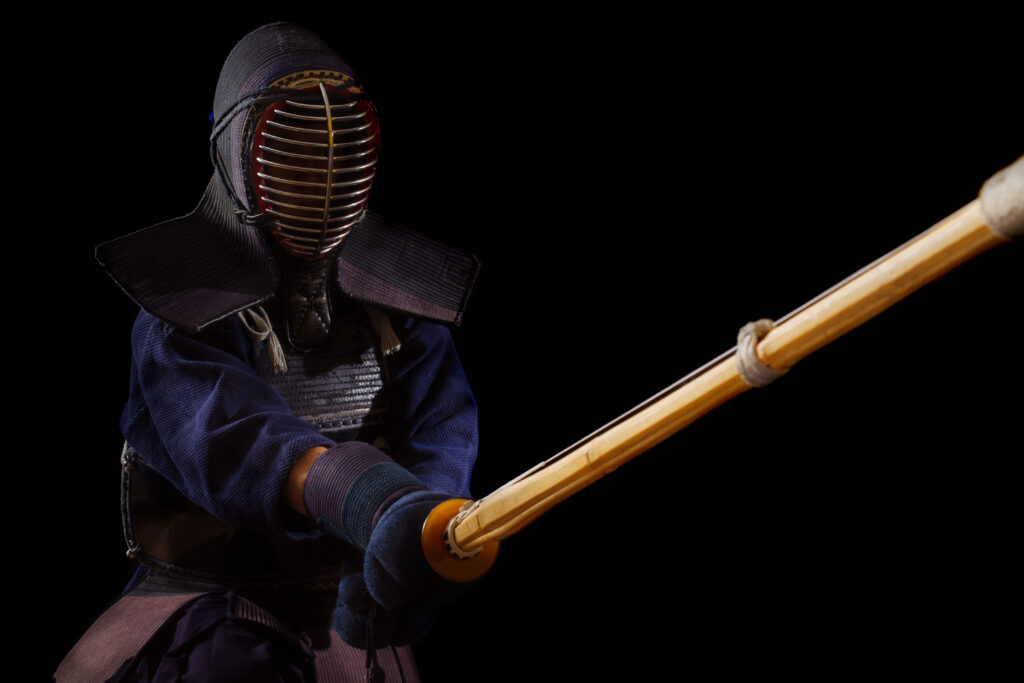
Basic Guide To Shinai Maintenance
A Shinai is one of the most essential tools for practicing Kendo. It can easily be damaged without proper maintenance, especially if you practice often.
Understanding how to take care of a Shinai will not only for longer use over time, but also to prevent accidental injuries during practice. Here we shall talk about all the things you need to know on proper Shinai maintenance.
Understanding the Properties of A Shinai
Before we dive into how to take care of a Shinai. Let’s talk about its characteristics and how it would break over wear and tear.
The Shinai is made up of 4 dried bamboo slats. Bamboo, unlike most hardwood, is very flexible and has great durability for resisting impact. However, it gradually loses these qualities as it becomes more dry.
To maintain its integrity, you can apply plant-based oil over the slats. This seals the existing moisture within the slats
Although most plant-based oils will work (camellia, rapeseed, olive, canola oil), some say it can turn rancid and give the Shinai a foul smell. Mineral oil is typically the safest albeit more expensive choice. I personally use canola oil and it works just fine for me.
How to Oil Your Shinai
Before applying oil, it is best to disassemble the Shinai for a thorough coating on all sides of each slat.
Take a cloth or paper towel and lightly soak it with some oil. Then give each slat a generous wiping until the whole surface is glossy.
Set the slats aside for 2-3 days to allow the oil full absorb. Then wipe away the excess before reassembly.
If you are opening up a new Shinai shipped from overseas, you may need to coat it multiple times. New Shinais are usually very dry and are prone to breaking if you don’t oil it.
General Shinai Maintenance For Longevity
If you reside in a place with frequently cold and dry weathers like me (in Canada). I recommend oiling your Shinai the day you receive it and every week or bi-weekly afterwards.
My experience is to oil the Shinai more frequently the more often I practice (3-4 times a week). That being said, it is also important to regularly check your Shinai for splinters and cracks before and after practice.
When the Shinai breaks, keep the slats that are still intact. These parts can be reused either for repairing other broken Shinais or even assembling an entirely new one, aka a Frankenshinai.
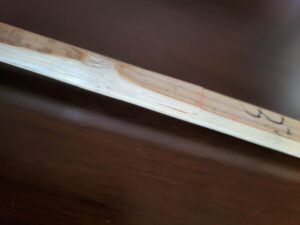
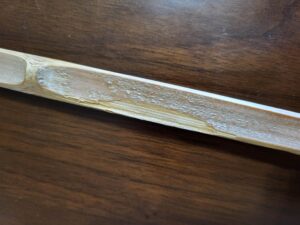
When the Shinai has minor splinters or chipped surfaces. You can repair it by shaving off the splintered edges and smoothen it out with sand paper (further instructions below).
When not in use, keeping your Shinais stored within the plastic packaging/bag it came with can also prevent unnecessary drying.
Determining How to Repair Your Shinai
While I think it is good practice to assemble new Shinais with salvaged slats. It is important to know when a slat is damaged beyond repair and must be replaced.
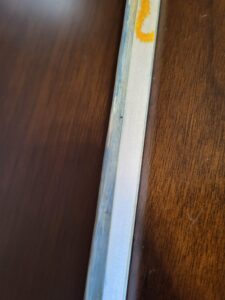
Slats that have cracks in the center can not be reused. The core is damaged and would not be safe for practice. I also highly discourage gluing the cracks together.
Slats with minor splinters or chipped surfaces can be reused after reused. After shaving off the roughed edges, and resurfacing with sand paper, and oiled thoroughly.
Repairing A Splintered/Chipped Shinai
What you’ll need:
– A Kezuri (shaving) knife or something similar (a utility knife works as well)
– Fine finish sanding paper/sponge (220-grit or above)
– Vegetable grade oil
– Towel/Paper towel
– Newspaper
– Safety gloves
Step-by-step
1. Create a work area by setting newspaper on the floor or over the table
2. Wear Gloves
3. Disassemble the Shinai
4. Shave down the splintered edges with a knife.
5. At a slanted angle with the edge pointed away from you, repeatedly draw the knife in one direction from the handle to the tip. (Make sure to shave the surface evenly without creating deep curves into the slat)
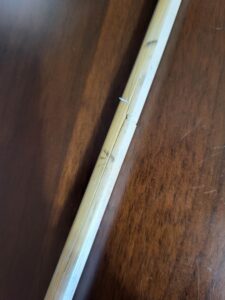
6. Repeat until surface is fully even and no splinter edges are visible.
7. Run sanding paper/sponge back and forth the shaved surface until smoothened
8. Coat the sanded area with oil (refer to section above)
9. Reassemble the Shinai
Making Sure Your Shinai Is Assembled Properly After Maintenance
Whether it’s replacing or repairing slats. It is important to check all parts of the Shinai for hidden cracks and splinters on the inner parts of the slats. Also making sure that there are no loose parts after reassembly.
Check that the Nakayui (center binding leather string) and the Tsuru (string on the back of the Shinai) are tightened. Loose bindings can be dangerous and cause Shinais to slip and cross into each other during sparring.
Final Wrap Up
A Shinai is a fundamental tool in Kendo. When your tools are being cared for properly, you can practice wholeheartedly without distractions.
By making a good habit of checking and maintaining your Shinai. You not only maintain its longevity, but also create a safe practicing environment to those that train with you. Cheers!
Source
https://budo-kendo.com/shinai-maintenance
https://kendokyoto.com/fs/minamoto/c/shinaisyuri